Enabling Meta Pixels
1. Why use a Meta Pixel
A Meta Pixel is how you tell Meta who engaged with your Listing and who showed buying intent. Those signals power retargeting and smarter delivery: Meta can re-show ads to people who clicked through to a retailer and find more people who behave like them. The payoff is warmer audiences, more efficient campaign spend, and ads that sharpen over time instead of starting cold every campaign.
For Pour Now, the signal that matters is the retailer click: a shopper clicking through from your Listing to buy at a retailer. That click is your conversion event.
2. Getting Started with Meta Pixels
Use Meta's instructions to create a pixel within Meta Events Manager. If you already have a pixel created, skip to Section 3.
Steps to Create a Meta Pixel
- Log in to the Meta Business Suite and make sure your business portfolio is selected.
- Open the menu and go to Events Manager.
- Click + Add or Connect data and choose Web.
- Type a clear name for your pixel or dataset.
- Click Create pixel or Create to finish setting up the account.
3. Enable the Pixel in Pour Now
Copy the Database ID (Pixel ID) to enable it in your Pour Now Listing. For each Listing you want to enable the Pixel on:
- Click the "..." on the right hand side of the Listing card
- Select Tracking
- On the Meta Pixel card, click Enable
- Paste your Database ID (Pixel ID) and click Done
Test that the Pixel is working:
- Click the "..." on the right hand side of the Listing card.
- Select Links.
- On any of the Listing Links, Open URL.
- If you do not yet have the Meta Ads Data Advisor, install the extension in your browser using this link.
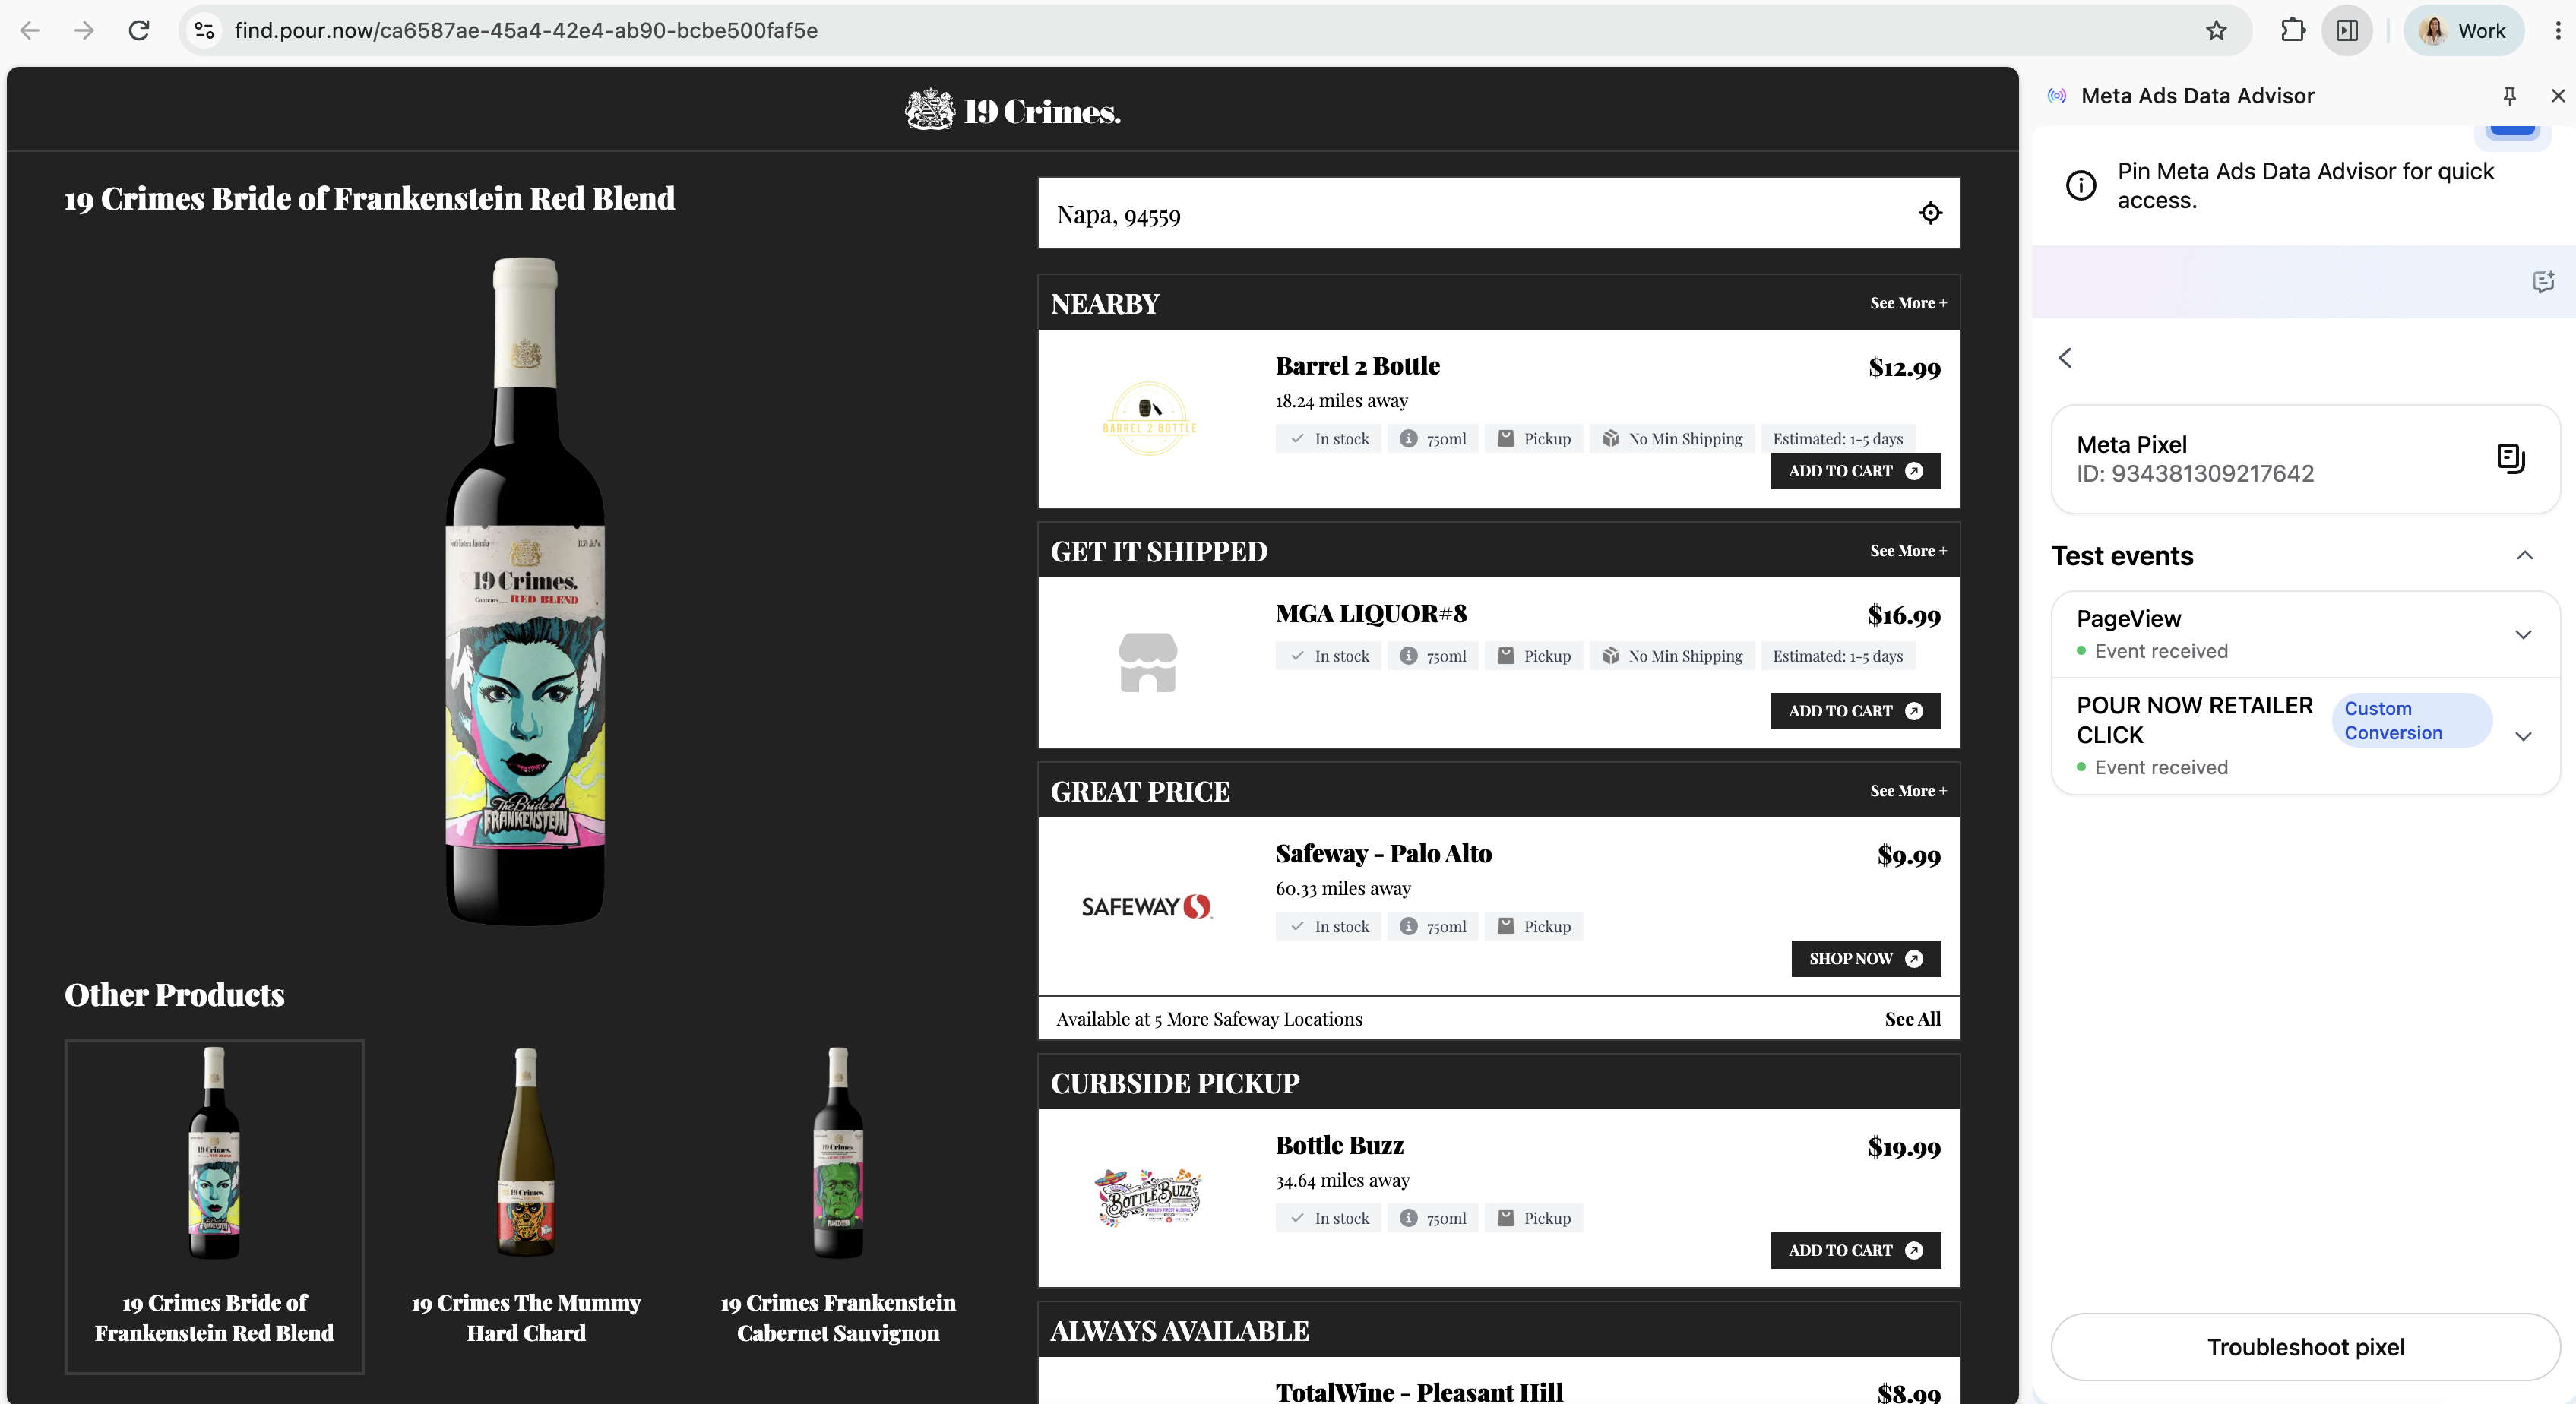
- Use the Meta Ads Data Advisor extension to verify that the Meta Pixel was properly installed on the Listing. You may need to refresh the page.
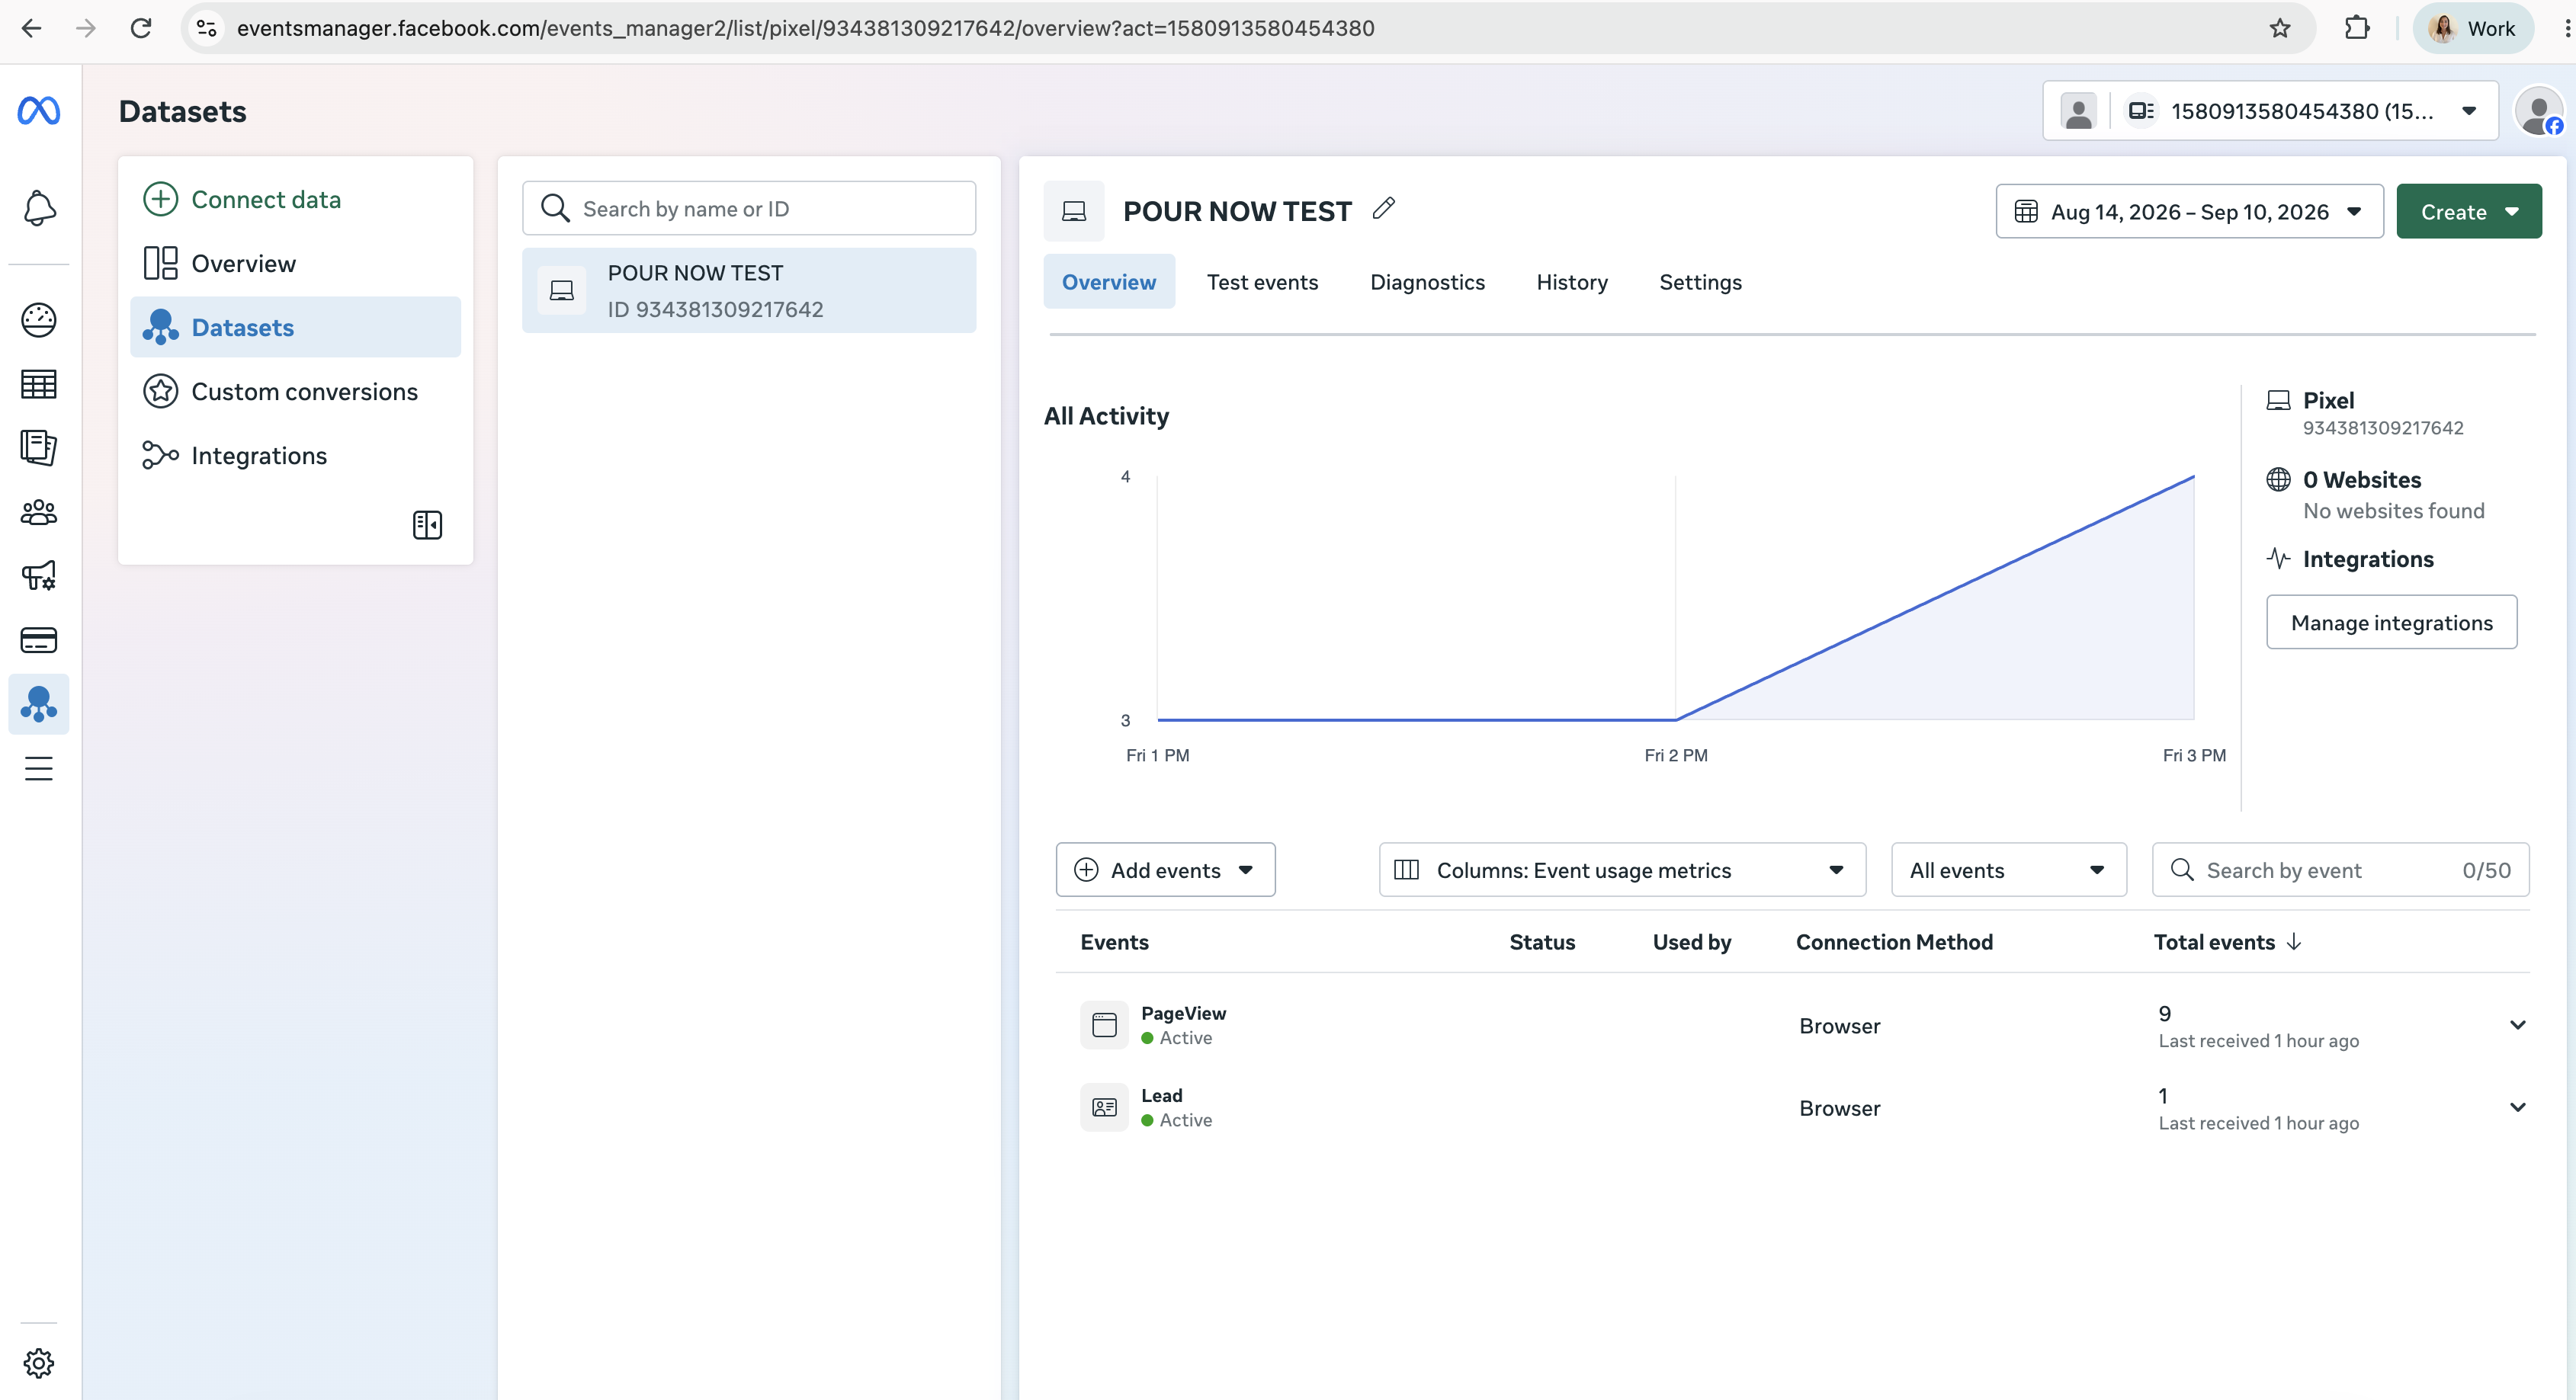
- After 30 mins - 1 hour, you should also see the PageView events flow into Meta Events Manager.
Continue to section 4 to set up the most important event: Leads on Retailer Clicks. You will optimize the campaign based on the Custom Conversion.
4. Add Events to the Pixel
To set up events for your Meta Pixel, use the built-in Event Setup Tool inside your Meta Events Manager to track website actions without writing any code.
- Go to the Meta Events Manager and click on Datasets on the left menu.
- Select your active Pixel (or Data Set).
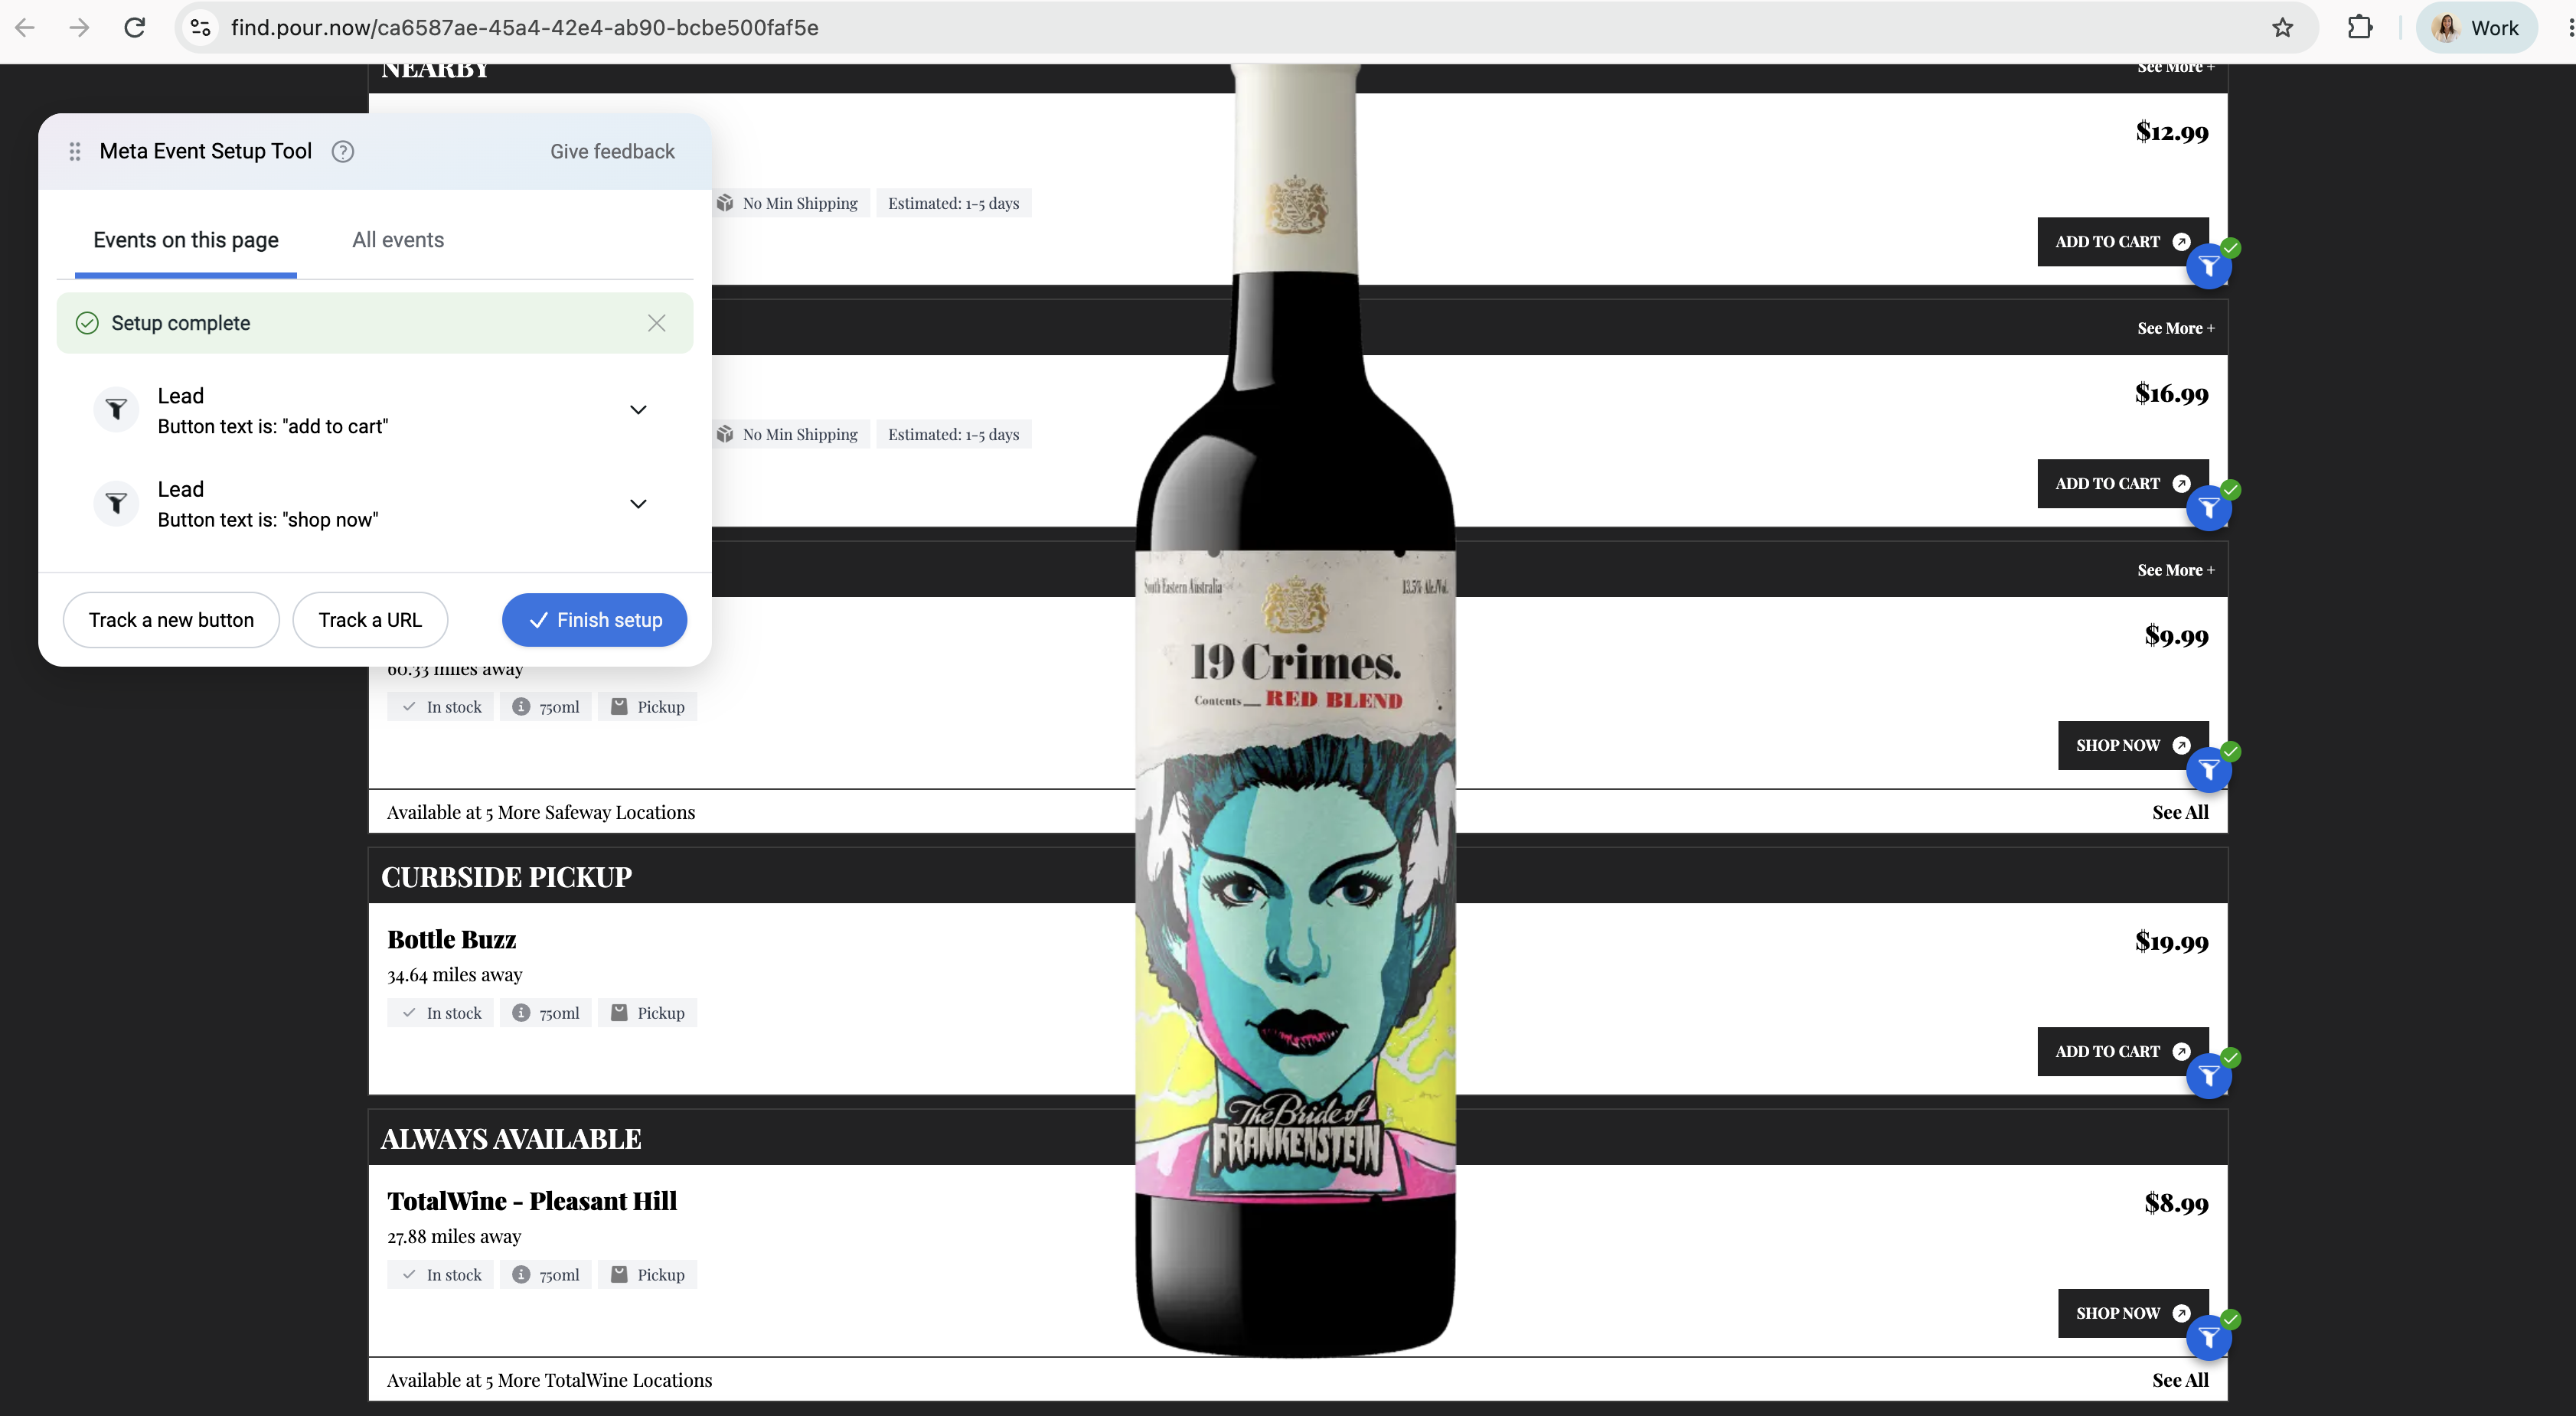
- Click on Set up events or look for Manage Integrations under your Meta Pixel, then click Open Event Setup Tool.
- Type in your Listing's base URL (ensure you include
https://) and click Open Website. A small Meta overlay box will appear directly on your Listing. Choose: - Track a New Button: Click any highlighted button on your Listing (both "Shop Now" and "Add to Cart") and assign an event label (Leads). Do not include currency.
- Click Finish Setup in the overlay box to save your configuration.
- Test the setup by opening the Listing URL and clicking on "Shop Now" or "Add to Cart" CTA buttons. After 30 mins - 1 hour, you should see the Lead events flow through into Meta Events Manager.
5. Create a Custom Conversion
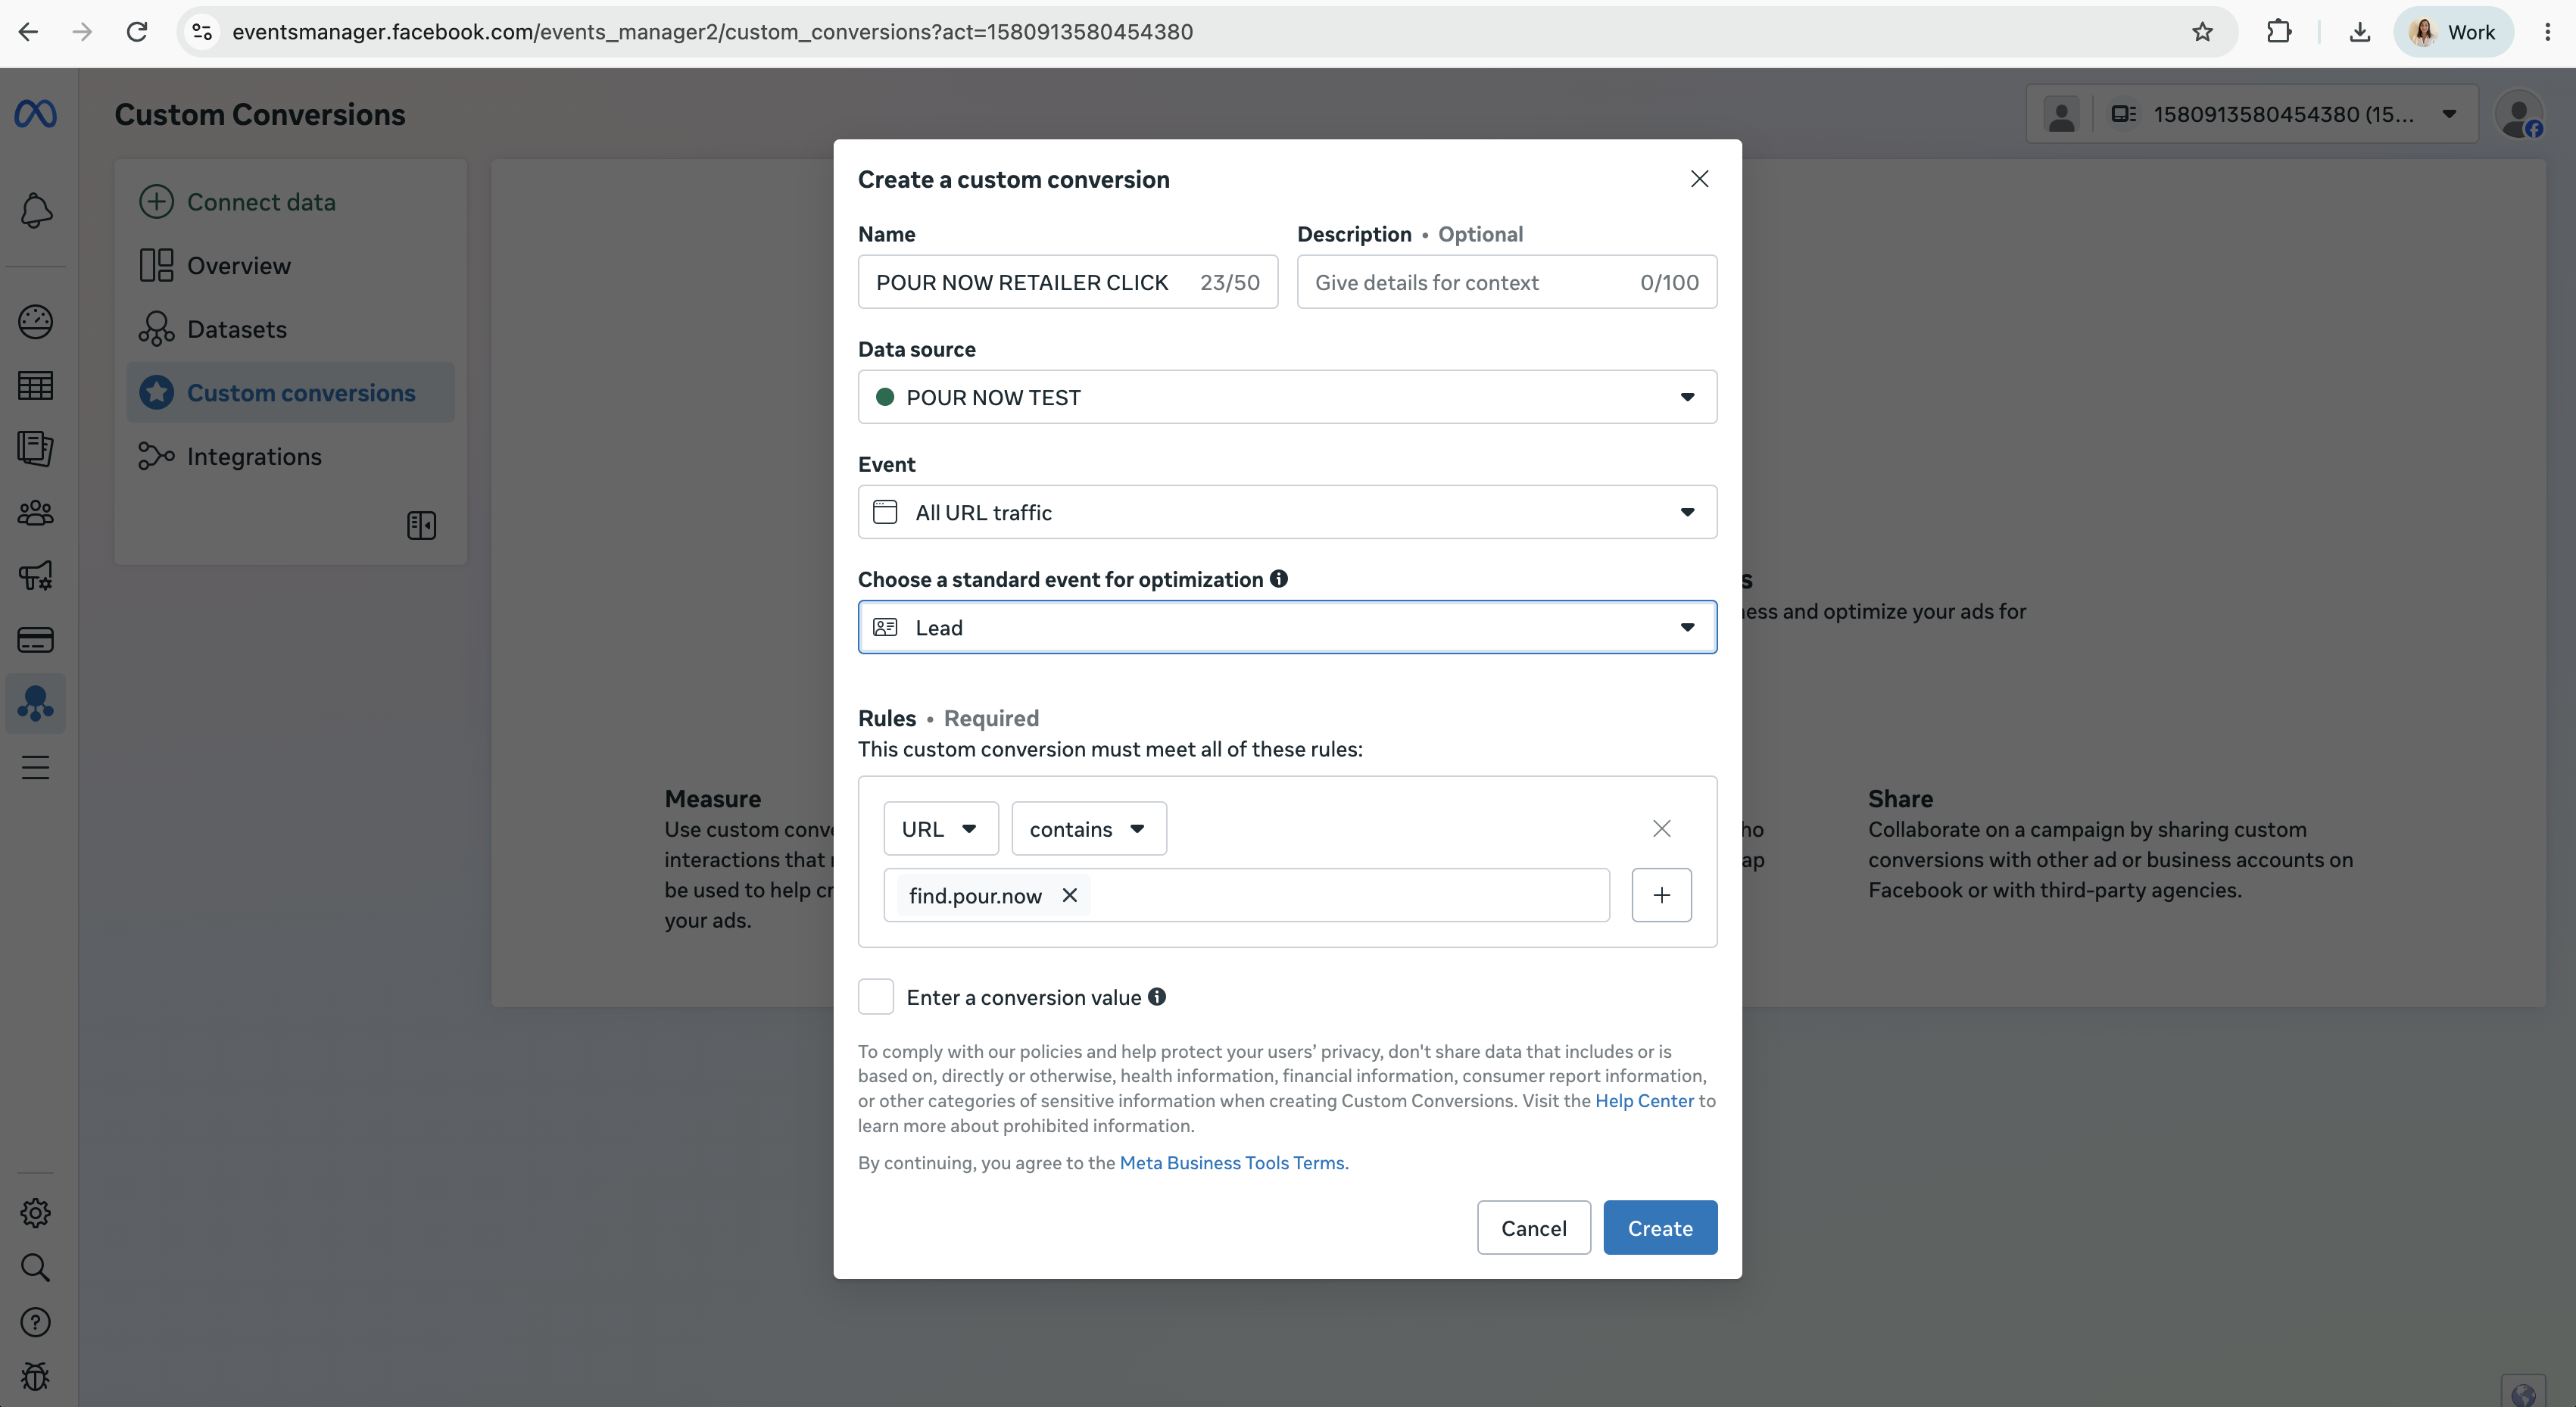
- Open Events Manager: Log in to your Meta Ads Manager and navigate to Events Manager from the main menu.
- Go to Custom Conversions: Click on the Custom Conversions icon or tab on the left-hand sidebar.
- Click Create: Select the Create custom conversion button.
- Name and Describe: Enter a clear, descriptive name ("Pour Now Retailer Click") and an optional description.
- Select Data Source: Choose your installed Meta Pixel or dataset from the dropdown menu.
- Define Rules: Select your conversion event (Standard event = Leads) and set your criteria using URL rules (e.g., URL contains "find.pour.now").
- Add Value (Optional): Do not add this.
- Finalize: Click Create to activate your custom conversion.
- Test the setup by opening the Listing URL and clicking on "Shop Now" or "Add to Cart" CTA buttons. After 30 minutes to 1 hour, you should see the Custom Conversion flow through into Meta Events Manager.
- You should also see the Custom Conversion Meta Ads Data Advisor on the Listing URL.